How to Hike The Incredible Torres del Paine W Trek in Patagonia
This blog post will in no way do the beauty of The Torres del Paine W Trek in Patagonia justice. It is the most beautiful place I have ever experienced. But I will navigate you through booking and hiking this amazing trail so you can go get your mind blown too.
The Torres del Paine W Trek is a 55 mile hike through Torres del Paine National Park, Patagonia, Chile. It is full of glaciers, mountains, rivers, and the most brilliantly blue lakes. It is most commonly hiked in 5 days and has been called the fifth most beautiful place in the world by National Geographic. It is the most beautiful place I have ever visited, if that counts for anything.
Before you go:
1. Pick a Time to Go.
In Torres del Paine, their seasons are opposite ours in the US. We chose to go in February, which is the middle/end of their summer. The weather changes every few minutes in Patagonia, so you can’t really pick a perfect time. February worked out well for us. Click here for a handy site to help you.
October – April, you can do your own self-guided hike. If you go during the winter, May – September, you will have to go with a guide.
2. Book Your Travel.
Book your plane ticket to Chile.
If you’re traveling from the United States, we found that booking out of Miami to Santiago was cheapest and then we bought some cheap Southwest flights to get from Nashville to Miami. Cost was around $800 total (with Latam and Southwest), 9 hours flight time from MIA to SCL. Don’t forget that if you do it this way, you have to collect your bags and re-check them in between flights. For us, this meant carrying our saran-wrapped backpacks through the entire airport.
Next, book your flight from Santiago to Punta Arenas.
If you’re like me and you quickly learn that you know very little about where you’re traveling to once you’ve booked your ticket, let me tell you right now.. Chile is a long country, like absurdly long. We thought we could drive from Santiago to Patagonia (eye-roll) and learned that it’s a 30 hour drive.
Flights to Puerto Natales exist, but they are more expensive. Latam and Sky seem to be the options for Santiago to Punta Arenas, though; we went with Sky and did just fine.
Rome2Rio is an excellent resource for figuring out transportation options.
3. Consider Travel Insurance.
I checked with my regular health insurance in the states, and it was going to cover me. There are many options, though, if you choose to buy travel insurance.
4. Decide How You Want to Do The Torres del Paine W Trek.
Do you want to camp? Do you want to stay in refugios (lodges)? How much time do you want to spend in the park?
My vote is for backpacking and camping along the Torres del Paine W Trek.
There is something about carrying all of your belongings on your back that is both miserable and satisfying. Yes, your pack will be heavy and you might curse me while you’re on an uphill with a 40 lb pack on, but it is SO rewarding. It is also the cheapest option, you will feel more in tune with nature, you will look at the stars when you get up to pee in the middle of the night and almost cry at how many there are, and you will appreciate your warm bed when you get home just a little bit more.
Torres del Paine backpacking feels a little like cheat backpacking because you have access to the refugios, use flushable toilets, drinking water is usually available (you may want to bring a purifier for the busier streams), and you are only allowed to cook in designated areas that are protected from rain and cold (due to someone starting fire to way too many trees in recent years – you are not allowed to have fires anywhere in the park). If I’ve convinced you to camp, check out my Packing List for the W Trek.
If you want to skip roughing it, you have other options. There are refugios and domes that allow you to stay in a bed and not carry a tent. A lot of people choose to do this. More info on this as you continue reading.
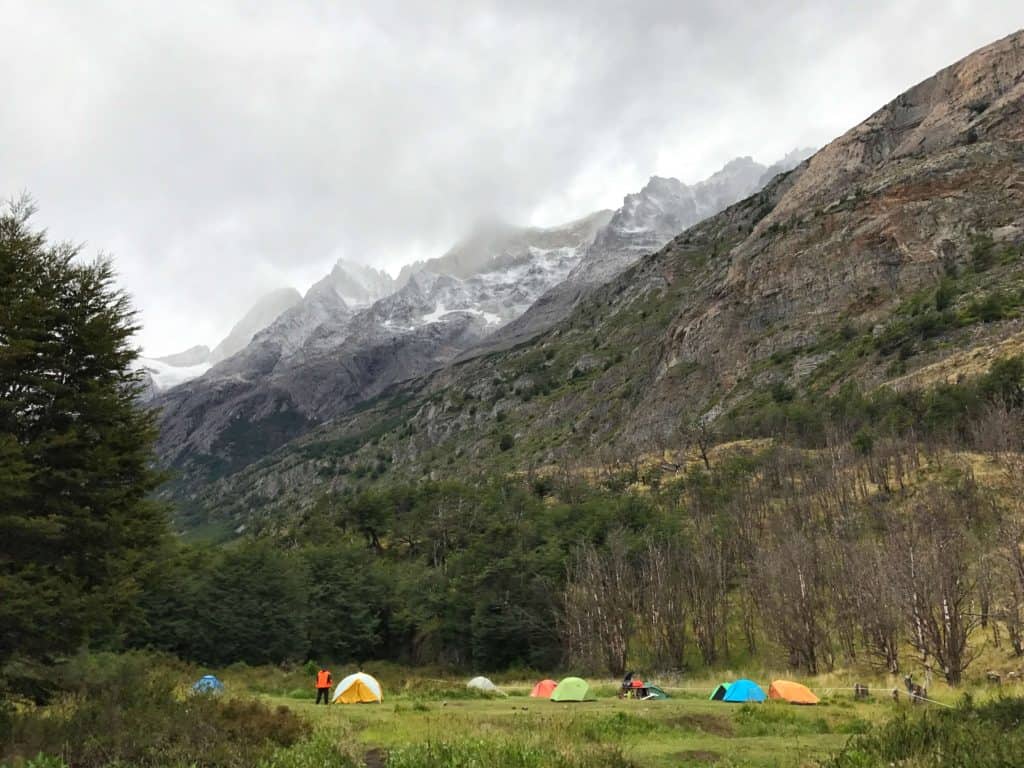
Camping at Refugio Grey – Have I convinced you to camp yet?
How many days?
We did 5 days, 4 nights for The Torres del Paine W Trek, which is kind of the norm. It allows you enough time to truly enjoy the incredible sights you’re seeing, but you do have some long hiking days. You could add a day and spend more time enjoying the beauty or skip a day and add more miles to your days.
Which direction do you want to hike?
My friend and I started in Refugio Grey and hiked to Torres. The Towers/Torres are the most anticipated part of the hike, so we liked saving these for last. It’s up to you. You do need to decide before you go, though, because you have to know when to book your campsites.
Once you have decided these things, you can move on to the next step.
5. BOOK YOUR CAMPSITES.
Please avoid the near-vomit experience we had when we realized you have to book all of your campsites in advance. We hadn’t, and we legitimately thought we had come all the way to Patagonia and were not going to be able to hike the W. They check your reservations at checkpoints on the trail, and the locals will warn you that you can be turned away in the middle of your hike if you don’t already have a spot booked.
I will go over exactly what campsites/refugios I stayed at/what I recommend later in this post. The following are your options for where to book in Torres del Paine; you can adjust based on how you choose to do your hike.
For more inspiration: check out 10 Bucket List Backpacking Trip Ideas. And learn the best backpacking tips for beginners.
These are the Campsites in Order (West to East)
I have eliminated the free closed CONAF sites – I’m not sure if/when they will re-open.
- Refugio and Camping Paine Grande (Vertice Patagonia)
- Refugio and Camping Grey (Vertice Patagonia)
- Camping and Domes Francés (Las Torres)
- Refugio and Camping Los Cuernos (Las Torres)
- Refugio and Camping Torres Central/Norte (Las Torres)
- Refugio and Camping El Chileno (Las Torres)
Las Torres
Refugios and campsites by Las Torres: They offer campsites, refugio beds, and domes at Torre Central, Los Cuernos, El Chileno, Seron, and Frances. You book online on their website.
FB = Full Board, meaning your meals are provided. They will serve you dinner, breakfast, and give you a packed lunch (this will affect how much food you need to carry in your pack). HB = Half Board, breakfast and dinner.
At places like Chileno, you have no choice but to do Full Board because they will not allow you to cook at your campsites. Cost is $90-210 depending on the site and whether or not meals are included.
Vertice Patagonia
Vertice Patagonia: They offer shelters or campsites at Paine Grande and Grey. Camping is $8-10 and beds in the shelters are $32-80. You book these online as well. They offer showers at specific times at night, and you are allowed to use the lodges to relax/get food if you choose to camp.
Free Campsites – Torres del Paine W Trek
** The free CONAF sites are closed for the 2023/2024 season and possibly indefinitely. You can reference this info for future seasons if they open, but you’ll have to book with the prior 2 companies for now. **
Free Campsites – Awesome, right? Yes, as long as you book them ahead of time, which is now what you have to do. I did not realize this when I went, and when I kept googling the campsites, I was unable to get any results. Because the website was still completely in Spanish.
Here ya go, book your campsites HERE. Click Reservar Camping Conaf at the bottom, and it will take you to the reservation page. You can book for Torres (Torres gets full FAR in advance) and Italiano through this site. I would recommend staying at both of these if possible. You are only allowed to book 1 night at each site, you receive a basic campsite with shelter for cooking, water will be available (it might be from a stream), and you have access to pit toilets. Take your garbage with you, and wash your dishes away from the stream!
Seriously, book all of your accommodations ahead of time.
When my friend and I went, I was convinced that we were unable to book these free campsites ahead of time. By the time we realized that we needed reservations, we were getting on our flight to Punta Arenas. We spent 3 hours anxious, wanting to throw up, and wondering if we were going to be able to do the trek.
All of the free campsites were booked, and many of the sites on Fantastico Sur and Vertice Patagonia were also booked. By the grace of God, someone must have cancelled reservations last minute, and we were able to book a campsite at Chileno and a Dome at Frances.
We greatly increased the cost of our trip and could have avoided this had we been more prepared. We laugh about it now and are so grateful that we were able to accomplish what we went to Patagonia to do, but please don’t make our mistake.
What to do if you have arrived at Torres del Paine W Trek and all the campsites are full — and you didn’t book in advance
First, don’t throw up.
The next thing you should do is scramble to find open campsites. Check all the sites above, every option, every possible date. If you have to pay $100 for a campsite, do it. If you have to change your itinerary because of availability, do it.
Keep checking.
We found nothing and then re-checked an hour later and found 2 openings. I’m not sure if someone cancelled or it was an actual miracle, but don’t give up on checking for campsites until the moment you lose Wifi.
If that did not work, and you are completely out of options and near vomiting… Here is what I can tell you. There are checkpoints (specifically leaving Paine Grande to head to Italiano) that park rangers check proof of your campsite reservations. They will not let you pass without a reservation for the campground you’re hiking to.
I was told by some hikers that they stayed at the free campsites without reservations and had no trouble. (No longer an option with the free campgrounds closed right now.) Other hikers who attempted this were kicked out. I was also told about another hiker who slept in the bathroom due to a lack of reservation. I don’t recommend this. You can risk it or you can do day hikes with Puerto Natales as your home base. Good luck!
6. Figure Out Where to Stay in Puerto Natales and How to Get to Torres del Paine W Trek
Punta Arenas offers many bus options to get to Puerto Natales. Once in the airport, ask about buses to Puerto Natales. We did not book this in advance and were easily able to find our way there. It’s about a 3 hour bus ride. Bus-Sur is the main operator.
Puerto Natales has many hostel options. It’s a very small town, it’s easy to navigate, and you will be able to find your hostel/grocery stores/restaurants from the transportation hub in the center of town. We did our research and stayed at El Patagonico. We loved it. Everyone we met was doing or had already done the W, so it provided great energy. It was very clean and staff was very helpful and kind. The hostel also had the option of booking your bus tickets to Torres del Paine.
Bus from Puerto Natales to Torres del Paine. Bus cost is around $27/18000CP. The bus ride is about 2.5-3 hours. I would recommend taking the early bus (6:45 or 7am) to arrive at the park earlier. I recommend booking a bus ticket ahead of time with Bus Sur. There is a transportation hub in Puerto Natales where you will have other bus options (or your hostel can book for you).
Arriving at Torres del Paine W Trek
Once you arrive at Torres del Paine (YAY. We were greeted by a double rainbow, and it felt magical), you will have to show your park pass, watch a video on how to be safe and keep the park safe, and then either board a catamaran or a bus, depending on which direction you’re hiking.
- The catamaran will take you to Paine Grande. It is $30 one-way; you will only need one way if you are hiking the W.
- If you have chosen to start at Torres, you will take a shuttle to Hotel Torres for around $5.
7. Book Your Park Entrance Ticket in Advance
Book your park entrance ticket online – they no longer accept payments at the park entrance. Book your ticket online here. Download the QR code in Puerto Natales with wifi – there is no signal in the park.
It will cost around $50 for your entrance ticket to do the W.
Congrats!
You’ve made it to the start of your Torres del Paine W Trek! Continue reading to see the Guide to Hiking the W where you will learn more of what to expect when you’re on the trail.
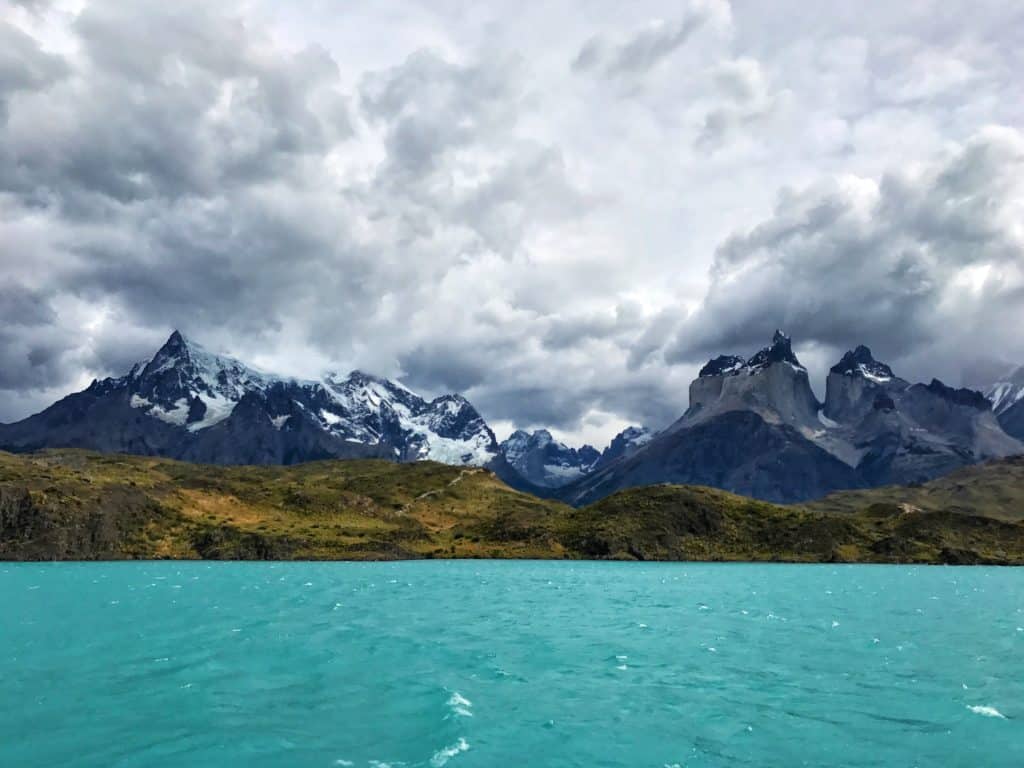
I took this during our catamaran ride. I still can’t handle it.
Guide to Hiking the Torres del Paine W Trek
I made this handy Torres del Paine W Trek trail chart for you to look at how far and how much time you can expect different parts of the hike to take:
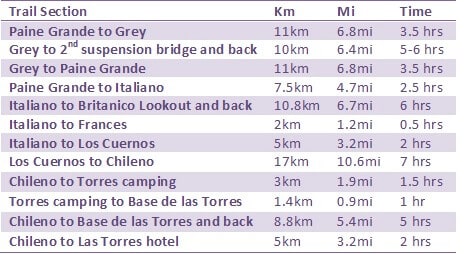
The W trek trail distances
I’d recommend eating lunch at the Paine Grande Lodge before you begin your trek up to Grey. You can purchase food or eat what you’ve packed.
I would also recommend leaving behind items that you don’t need for the next 24 hours. For a $5-ish fee, they allow you to leave a bag of belongings behind. My 2 fellow hikers and I filled a bag with food, clothes, etc. that we knew we would not need on our hike to and from Grey. This greatly decreased the weight of our packs, which was super helpful considering how much uphill hiking this part of the hike requires.
If you’ve followed the previous part of this post, you should find yourself at Paine Grande (if you’re following in the direction I hiked it.) At this point, we were completely overwhelmed by the beauty of this park and so excited to get started. The rain had already begun, quickly teaching us how much the weather can change in Patagonia.
And now you begin hiking day #1 of The Torres del Paine W Trek.
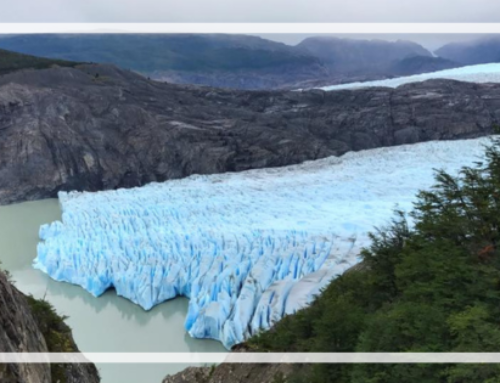
The hike from Paine Grande to Grey Lodge is 11km/6.8mi and should take you around 3.5 hours. It starts out on a basic hiking trail through hills, a view of Grey Lake, and then views of the glacier. I had never seen a glacier before, and it was stunning. Take some time to stare, in awe, at Grey glacier and to really realize what an amazing trek you are embarking on.
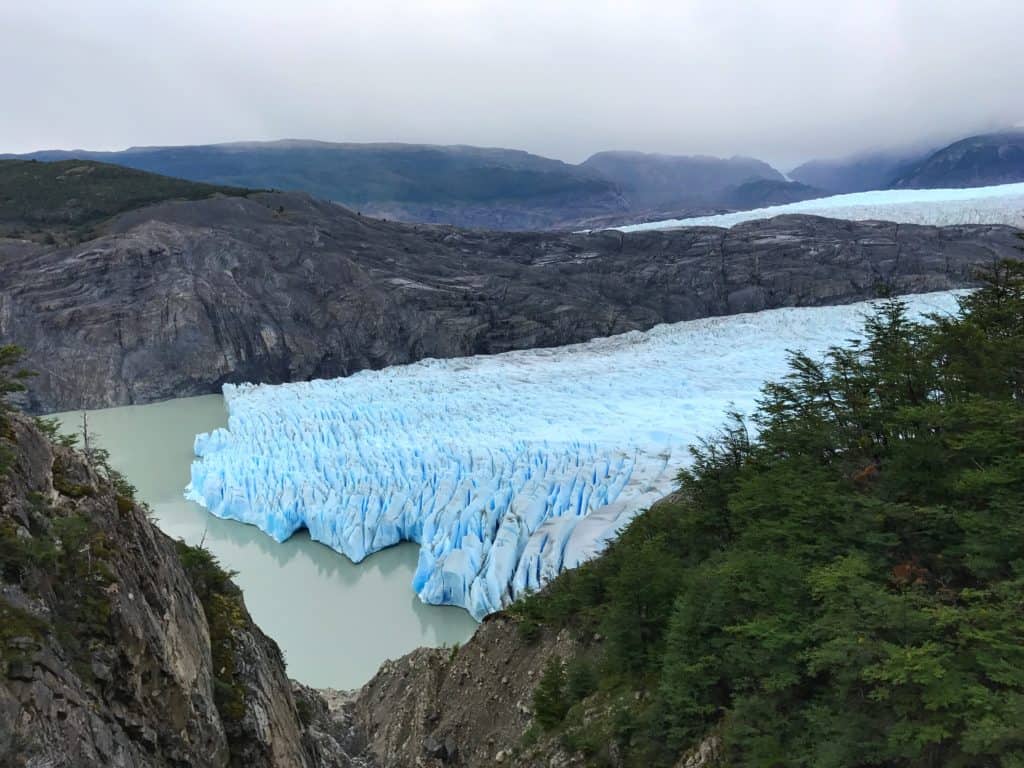
Glacier Grey – view from one of the suspension bridges
Of note, these photos were not taken by some crazy good photographer who is able to make views look a billion times better than they actually are in real life. All were taken on my iPhone 7 with my very non-professional skills. Torres del Paine is just THAT pretty.
Once you reach Grey Lodge, check in at the lodge or camping desk. If you would like to avoid numb fingers (like we had) while setting up camp, bring some waterproof or water-resistant gloves. There is an area for campers to cook and there is an area in the lodge to relax and eat if you have chosen to be served their food. You have the option of hiking down a little trail to get closer to the glacier while it’s still light out. You also have the option of using the showers during the designated evening shower hours. We were too cold to attempt this.
Get an early start for hiking day #2.
Especially if you want to hike up to the suspension bridges. I HIGHLY recommend doing this. It’s about a 5km/3.2mi hike each way, and I remember it taking us around 4-5 hours. It was so worth it, though, and this is a shorter hiking day anyways. Leave your packs at Grey Lodge and go see the suspension bridges. There are 2, and the 2nd one is incredibly beautiful because you get a closer look at the blue glacier. You do not need to go all the way to Paso camping zone, though.
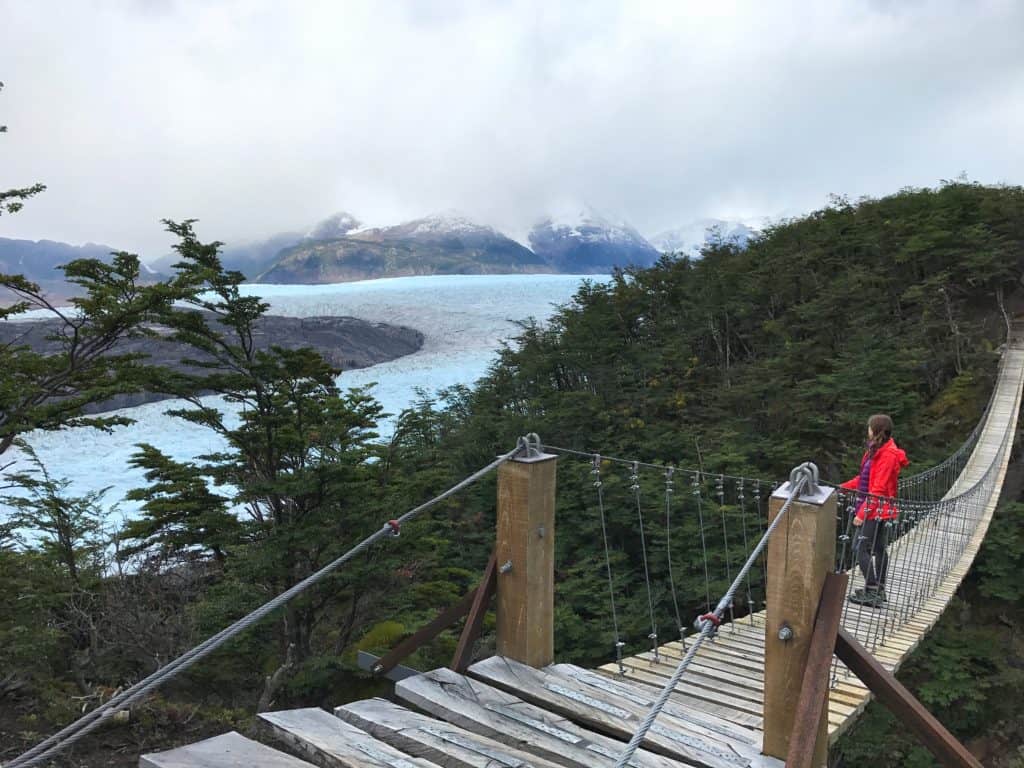
Suspension Bridge – Have I convinced you that the extra hiking is worth it?
After you get back, have lunch and pick up your pack; you will be doing the same hike back to Paine Grande. You have a second chance to luck out with good weather and good views of the glacier and lakes. We were giddy because of how clear the skies were for our 2nd day of hiking.
Paine Grande camping zone is known for being SUPER windy. Set up your tent near the mountains if possible because they block a bit of the wind. This was our coldest night of camping. Don’t forget to pick up your left items, and then take advantage of the large room they have for cooking dinner. It does fill up with campers. You will want to have an early night because your next day is a long one.
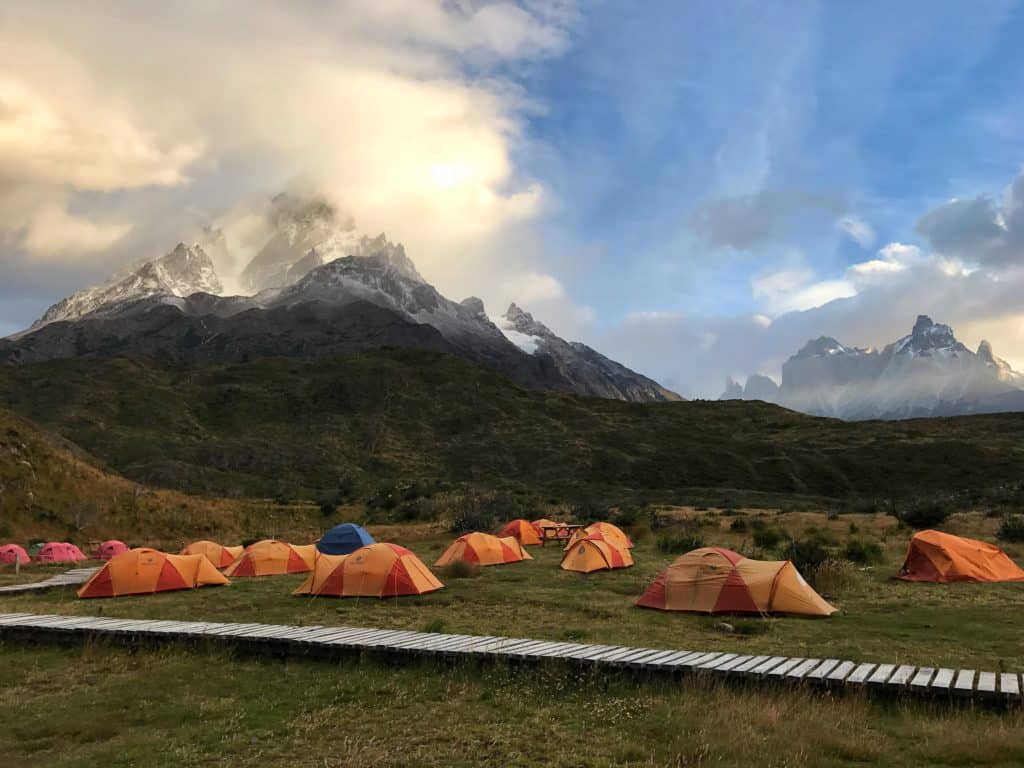
Paine Grande Camping – WHAT a backdrop, right?
Hiking day #3 in Torres del Paine W Trek.
You will cover a lot of miles depending on where you are staying on night #3. Start early and hike to Italiano. It is a 7.5km/4.7mi hike that takes around 2.5 hours. It is, of course, beautiful. We rounded a corner and saw a view that looked like a painting. And the lake views! I did not know lakes could be such different colors. You also hike through dead tree forests, killed by fires. It felt eerie and was a reminder to be cautious whenever you are in the wilderness. Make sure you look left when you cross the bridge into Italiano.
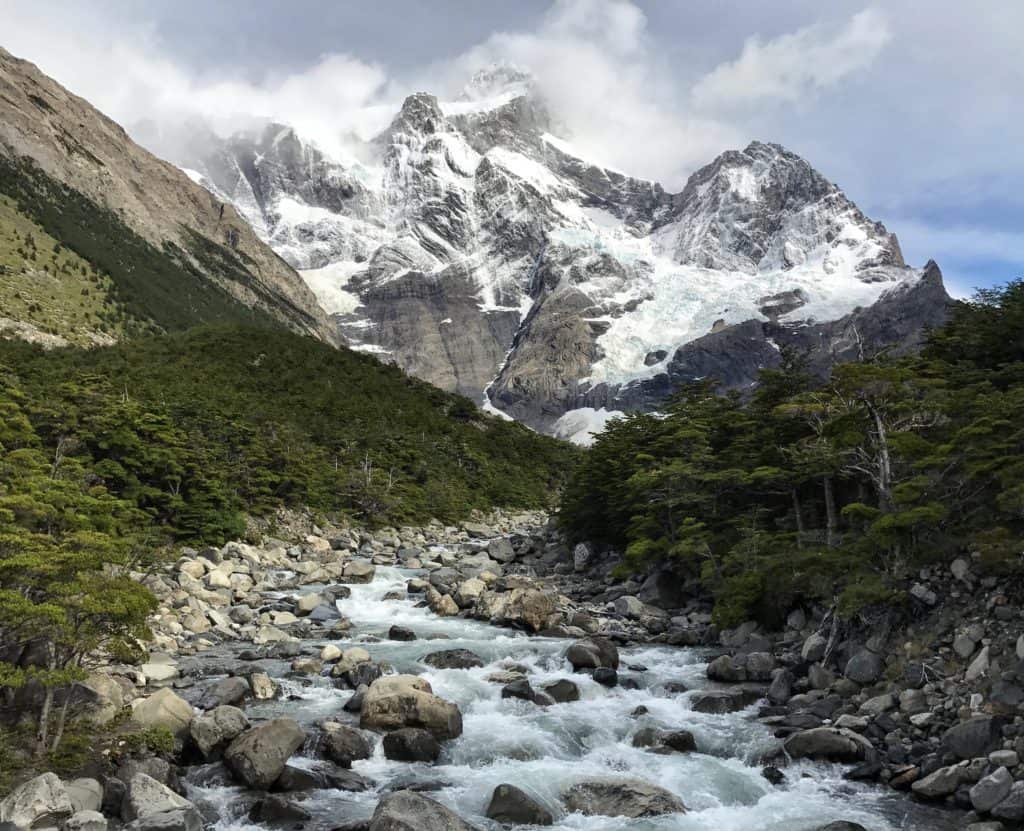
This was one of my favorite photos from the trip – Taken from the bridge into Italiano
Once you get to Italiano, leave your pack (there is a designated area for this, and trust me, you do not want your pack for this straight uphill part of the hike). There is a stream if you need to fill up on water. We purified ours, but I don’t think this is required. Some people opt to skip the Britanico lookout, but it is A. the middle of the W so you technically need to do it to do “the W” and B. it is unbelievably gorgeous. It is a very strenuous hike, though, so mentally prepare yourself for it. There are some rock scrambles, it is almost entirely uphill, and very windy. It is a 10.8km/6.7mi hike total and does take 6 hours. The views you witness make it so worth it.
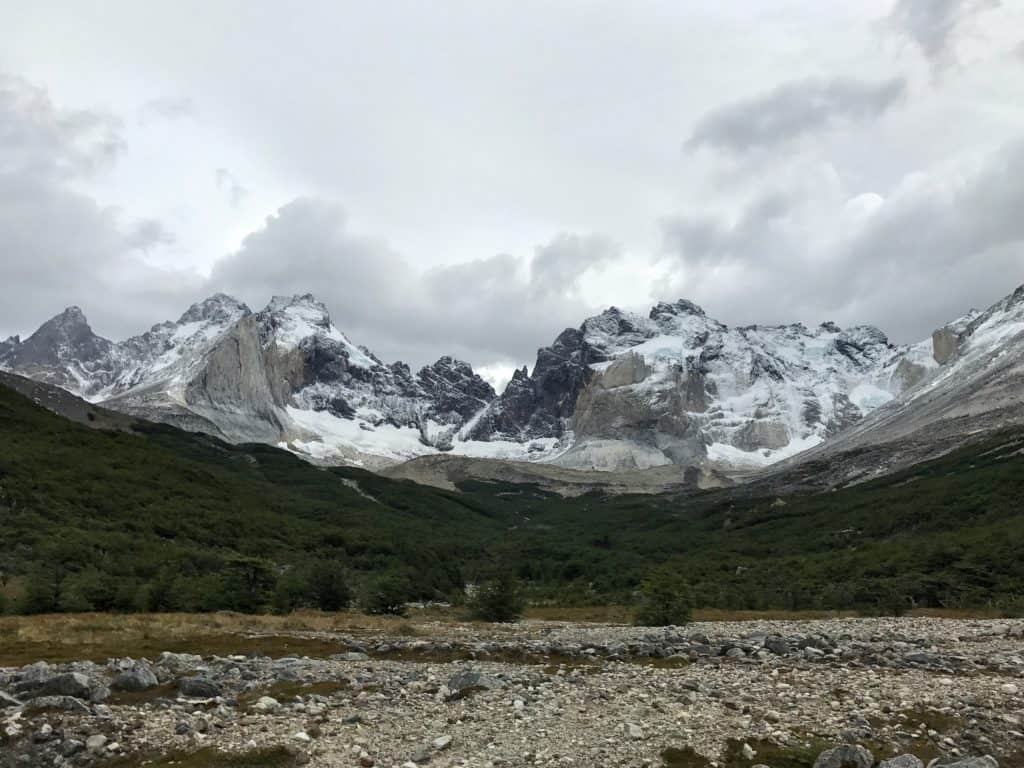
View from Britanico hike – it is so difficult but so worth it
Camping Options
Italiano is one of the free campgrounds on the W Trek in Patagonia, so if you have decided to spend the night, you are already at home sweet home for the night. If you have a campsite or dome at Frances, you have a 2km/1.2mi hike/30minute hike. If you have a campsite or room at Los Cuernos, you have a 5km/3.2mi/2.5 hour hike left. Basically, you have 3 options. We stayed at Frances (all due to our mistake of not having a reservation and a dome being our only option), but I really thought this ended up being a great way to do it. Hiking day #4 is really long, so the further you get on day #3, the less you have to hike on day #4 (so some choose to camp at Cuernos).
But… the hike from Frances to Los Cuernos in the early morning was one of my favorite parts of the trek in Torres del Paine. You are hiking alongside a lake for almost the entire 2 hours. During sunrise, the colors and clouds were epic. It was 6am, but I couldn’t stop yelling about the beauty of it. But, it is totally up to you where you stay.
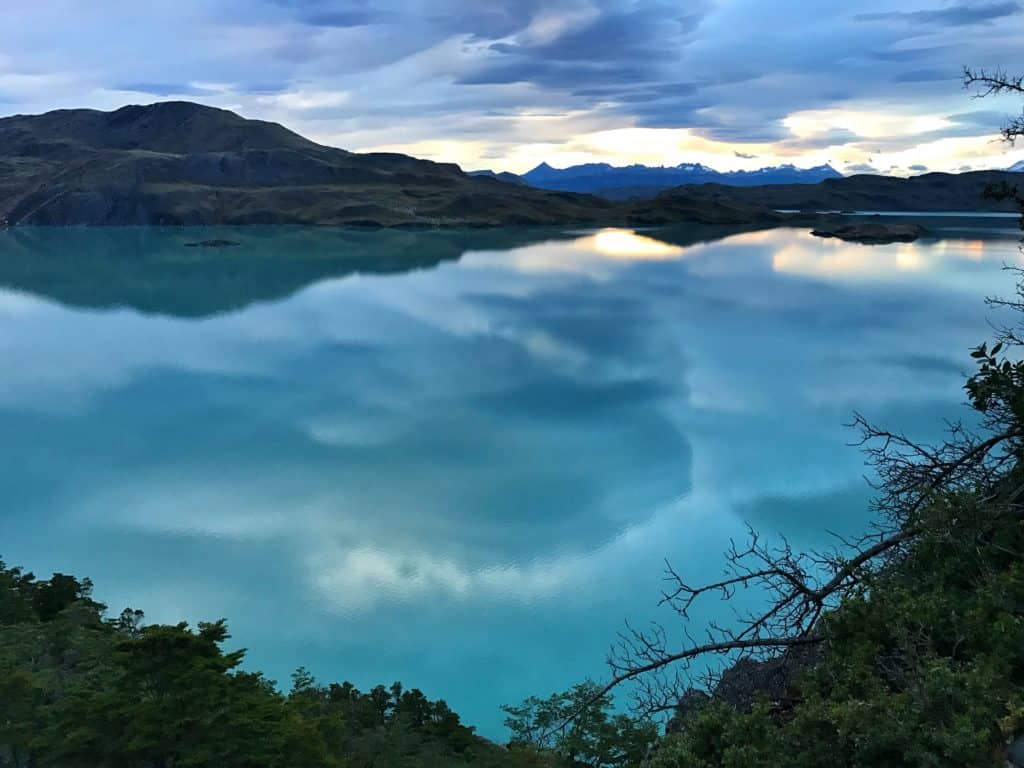
Lake sunrise – when I was rightfully losing my mind over the beauty
Hiking Day #4 in Torres del Paine is a long one.
You will start from Italiano, Frances, or Los Cuernos. From Los Cuernos to Chileno, you are in for a 17ish km/10.6mi hike that will take you around 7 hours. There is a shortcut to the left that keeps you from having to hike to Las Torres hotel and then up. I recommend it, but it can be muddy. This is a long hike with your heavy pack. If there was ever a moment of struggle for me, it was towards the end of this portion as we were reaching Chileno. I was exhausted, hot (yes, the sun came out again!), and sore. Eat an energy bar and power through.
You have some options here:
- Camp at Chileno like we did. I am so glad we did this because I could not have carried my heavy pack for one more second.
- Camp at Torres camping zone. 3km/1.9mi/1.5hours from Chileno. It is closer to the towers, and it’s free.
- Hike to the Towers after a quick break.
- Wake up and hike to the Towers in the morning for sunrise.
- Hike to the Towers in the afternoon and in the morning.
The best moment
Getting to the Base de las Torres is the most amazing feeling. It is a strenuous hike, after already doing strenuous hikes. But the accomplishment of making it here. Gah. I am not a good enough writer to be able to adequately describe the excitement and awe we felt when we reached this view. Take it in. Sit on the rocks. Yell in excitement. Take a billion pictures. Cry maybe. Fully soak in that moment.
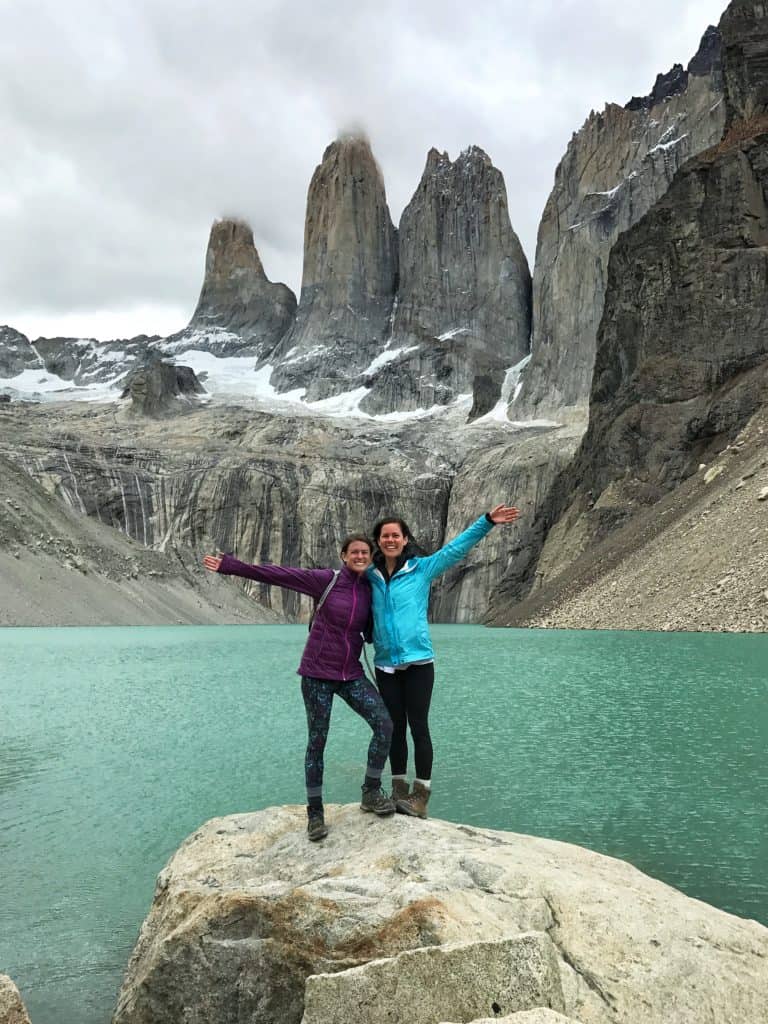
The Towers – the highlight of The W Trek in Patagonia.
I am sure you have seen photos of the sunrise at the towers. The sun hits them and lights them up orange. It could be a highlight of Torres del Paine. We did not get to witness this, but we truly didn’t care. The time we spent staring at them was perfect. Our next morning called for storms, and we were content with what we saw. It is all up to you, though. If there are great weather predictions for the next morning you’re there, go for it. If there is great weather the afternoon you get to your campsite, though, you may want to hike then too. The weather is so unpredictable, and if it’s cloudy, you can’t even see the towers. The hike from Chileno to the towers is 8.8km/5.4mi/5 hours there and back. It’s not easy. Enjoy it.
Your last day of hiking in Torres del Paine W Trek, Day #5.
It will either consist of your sunrise hike to the base of the Towers (keep in mind, you will be starting your hike in the dark if you want to see the sunrise there – you have to leave at 3am or so depending on the exact sunrise time. The lodge will have a sign telling you this information) or you hiking out of the park.
From Chileno, it is a 5km/3.2mi/2 hour hike to Las Torres hotel. This was a bittersweet hike for us. We were excited for all we accomplished and so ready for civilization, but we were also so sad for our trek to be over. You can take a bus from Las Torres hotel to the park entrance and then take a bus from the park entrance back to Puerto Natales. We had to hike a bit from the hotel to the visitors center to get the shuttle tickets. The visitors center has a little cafe, souvenirs, and a place to sit while you wait for your shuttle to the park entrance/your bus. Everything worked out time-wise to get us back to Puerto Natales and to our hostel, hot showers, and a real bed.
Congratulations! You hiked the W Trek in Patagonia. You backpacked 55 miles and earned the most gorgeous views. Now go convince all your friends and family to do the same.
Pin this Backpack the W Trek in Patagonia Guide
Great post! Torres del Paine is so high on my list of destinations to visit, it looks incredible and this hike looks amazing 🙂
Thanks! I really hope you make it there someday. It’s the most beautiful place I’ve ever experienced. If you do plan a trip, let me know if I can be of any help!
Thanks Danielle, I hope so too! I will definitely be in touch if (when!) I make it there 🙂
Most of the reviews I’ve found complain about the crowds. Nice to see one that is positive (since I’ve already booked my trip!)
Crowds there exist, but the beauty definitely stuck in my memory more than the people. Plus, the park is so big, you can spend hours hiking (especially if you start early) and hardly pass another soul. Are you going to do the W trek as well? Let me know if there’s anything I can help you with!
Oh yeah, Torres del Paine is such a gem, I loved every minute of it! But I remember the pain of booking with Vertice 😀 😀 😀
SUCH a gem. Haha, booking lodging there was truly the worst, though.